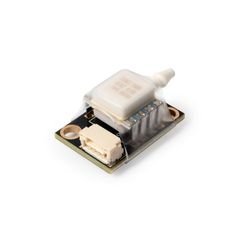
The short answer
Pick the pressure range from your working depth, at about 1 bar per 10 m of seawater, so 0–30 bar covers 300 m. Then check the interface: Blu-Sub's M8 and M10 sensors use I2C at 3.3 V on address 0x76, and the M14 uses 5 V serial at 115200 bps. Zero the sensor at the surface on every deployment.
- Resolution (0.2 mbar) and accuracy (±200 mbar) differ by a factor of a thousand.
- 30 mbar of change in the weather reads as 0.3 m of false depth.
- Connecting the 5 V M14 to a 3.3 V-only input without a level shifter can damage the pin.
How to choose an ROV depth sensor: pressure range, accuracy and interface compatibility
A depth sensor doesn't measure depth. It measures pressure, and something else turns that into metres. Most of the error in a depth reading comes in during that conversion, so the datasheet accuracy is usually the smallest part of the total.
Start from working depth, then check the overpressure limit
Pressure and depth are related by p = ρgh: density times gravity times depth. In seawater at 1025 kg/m³ that is close to 1 bar of gauge pressure for every 10 metres, which is why a 0–30 bar sensor is listed for 0–300 m. Our pressure and depth conversion guide has the reference table, and the depth-to-pressure calculator does the arithmetic for either water type.
Choose a range that covers the working depth with real margin, then check the overpressure limit separately, because that figure decides whether an accident costs you a sensor. The Blu-Sub M8 and M10 depth sensors are 0–30 bar with a 50 bar overpressure limit; the M14 metal-diaphragm sensor is 0–35 bar with a 70 bar limit. Those are ratios of roughly 1.7 and 2.0 above full scale.
Don't just take the biggest range available. Accuracy on these sensors is a fraction of full scale, so a sensor with twice the range has twice the error in metres at every depth, including the shallow water where an inspection ROV does most of its work. Pick the smallest range that covers the mission with margin.
Resolution, accuracy and full-scale error are three different numbers
The M8 and M10 sensors list a pressure resolution of 0.2 mbar and an accuracy of ±200 mbar relative. The two differ by a factor of a thousand and mean different things. Resolution is the smallest change the sensor reports; accuracy is how far the reading can be from the truth. A reading that moves in 0.2 mbar steps can still be 200 mbar out.
Convert the accuracy into the unit you care about. Rearranging p = ρgh gives h = p / (ρg). For 200 mbar, which is 20,000 Pa: in seawater, 20000 / (1025 × 9.80665) = 1.99 m; in fresh water, 20000 / (1000 × 9.80665) = 2.04 m. So ±200 mbar is about ±2 metres either way. If your survey needs a sample placed within half a metre, this class of sensor can't do it, and averaging won't remove a fixed offset.
The M14 is quoted differently: ±0.2% FS intrinsic error (±0.72 m) and a total error range of ±1% FS (3.6 m). "FS" is full scale — a percentage of the 35 bar range, not of the reading, so the absolute error is the same at 10 m as at 300 m. Check the arithmetic: 1% of 35 bar is 0.35 bar, or 35,000 Pa, which in fresh water is 35000 / (1000 × 9.80665) = 3.57 m — the quoted 3.6 m. In seawater the same error is 3.48 m. Note that the published figure in metres is a fresh-water conversion before you quote it in a seawater specification.
The split between intrinsic and total error is the most useful part of that listing. Intrinsic error is the sensing element alone; total error adds temperature and the rest of the operating range. Specify against the total.
Electrical interface: I2C for short runs, serial for long ones
The M8 and M10 depth sensors output I2C at 3.3 V logic and both sit at address 0x76. The M14 outputs USART (TTL) at 115200 bps with 5 V logic. That is the difference that damages hardware: connecting it to a 3.3 V-only input without a level shifter takes the pin past its rating. Check the controller input before you wire it.
I2C was designed to work across a circuit board. It only reaches a short way down a cable, and when it struggles it goes intermittent instead of failing outright, so the sensor works on the bench and glitches in the water. If the sensor sits on an end cap a few centimetres from its controller, I2C is ideal. For a long run, a serial link is more robust, which is a good reason to consider the M14 whatever depth you need.
The addressing has a useful side effect. The depth sensors are at 0x76 and the M10 water temperature sensor is at 0x77, so one depth sensor and the temperature sensor can share a single I2C bus and one set of conductors through the pressure boundary. That saves a penetrator, and penetrator space is usually the first thing to run out on a small end cap. Two depth sensors, both at 0x76, can't share a bus.
All three take a 5 V supply and draw very little: 1.5 mA peak for the I2C units, 20 mA for the M14. Supply voltage and signal voltage are separate specifications, and on these parts they differ: the I2C units signal at 3.3 V, the M14 at 5 V. Power won't limit you here; the number of conductors through the housing wall will.
Mechanical: the thread, the bulkhead and where it sits on the vehicle
The three depth sensors use different threads (M8 × 1, M10 × 1 and M14 × 1.5), and the mounting is part of the pressure boundary, so the thread is a sealing decision as well as a hole size. The M14 listing gives a mounting hole of 14.1 ± 0.1 mm and a recommended bulkhead thickness of 18 mm; check your end cap can provide that thickness before specifying it.
Weight differs more than the threads suggest: 10 g for the M8, 14 g for the M10, 82 g for the stainless-steel M14. On a small vehicle with a tight buoyancy budget that counts, and it sits at whichever end of the frame the end cap is on. Our buoyancy and ballast worked example shows how that adds up.
Where you mount it matters as much as which one you choose. Put the port where the water is still relative to the hull: away from thruster wash and away from the front face, because a vehicle moving forward builds pressure at its nose that the sensor reads as depth. Then measure the vertical distance between the port and the point the vehicle reports depth from. That offset is part of the error, and measuring it once removes it.
The M14's corrugated stainless diaphragm makes it the one for long deployments: the sensing element sits sealed behind a metal face. That, its 350 m rating, its overpressure margin and its serial output are the reasons to pay more for it. Its weight and larger thread are the cost.
Calibration and the errors that are not on the datasheet
Surface zero. A gauge reading needs a zero, and air pressure changes by tens of millibars from day to day. Zero the sensor at the surface at the start of every deployment. Zeroing it once when you build the vehicle isn't enough: 30 mbar of weather is 0.3 m of false depth.
Water density. Fresh water and seawater differ by about 2.5%, which is 2.5 m at 100 m depth. Brackish estuary water is somewhere between and varies with the tide. Whatever density the conversion assumes should be stated in the vehicle's documentation, so a reading taken in a test tank and one taken at sea are comparable.
Temperature. The total error figure already includes it, which is why you specify against total error. If you need better, the same I2C bus can carry a temperature sensor, and a measured water temperature also lets you correct the density figure instead of guessing it.
Datum offset and dynamic pressure, as above. Add them all up. A sensor quoted at ±2 m, mounted 0.4 m below the vehicle's datum, zeroed on a different day and converted with fresh-water density in the sea has a total error in which the datasheet figure is the smallest part. Write out the error budget once for your vehicle and set the tolerance against that total.
What to send with a depth-sensor enquiry
Maximum working depth and the depth accuracy the mission requires; fresh water, seawater or both; the controller and what interfaces it has free; the cable run from sensor to controller; the end-cap material and available thickness; how many conductors you can spare through the pressure boundary; and whether the vehicle also needs water temperature.
Ask about temperature early. If you want it, ordering both sensors together lets them share a bus and a penetrator, and fitting a second sensor later to an end cap with no free entries is a much bigger job.
The three depth sensors, compared
You need one of these three. Read the interface and accuracy columns together: those two, more than the depth rating, usually decide which one fits.
| Sensor | Range / depth | Overpressure | Interface | Accuracy | Thread | Mass |
|---|---|---|---|---|---|---|
| Subsea M8 Depth Sensor | 0–30 bar / 0–300 m | 50 bar | I2C, 3.3 V (0x76) | ±200 mbar relative | M8 × 1 | 10 g |
| Subsea M10 Depth Sensor | 0–30 bar / 0–300 m | 50 bar | I2C, 3.3 V (0x76) | ±200 mbar relative | M10 × 1 | 14 g |
| Subsea M14 Metal Diaphragm | 0–35 bar / 0–350 m | 70 bar | USART TTL, 5 V logic, 115200 bps | ±0.2% FS intrinsic; ±1% FS total | M14 × 1.5 | 82 g |
All three take a 5 V supply, but their signal voltages differ: 3.3 V on the I2C units and 5 V on the M14. The Subsea M10 water temperature sensor (±0.1 °C from −5 to 50 °C, M10 × 1, 19.5 g, rated to 1,000 m) isn't in the table because it measures something else. You fit it alongside one of these. Because the depth sensors sit at I2C address 0x76 and it sits at 0x77, a depth sensor and the temperature sensor can share one bus and one penetrator; two depth sensors cannot. Check the wiring documentation for the revision you receive before connecting it.
Parts in this guide.
Check the exact variant and revision before you order.
Subsea M10 Depth Sensor (0–30 bar)
300 m, I2C at 0x76, ±200 mbar, M10 × 1, 14 g.
Subsea M8 Depth Sensor (0–30 bar)
The same sensor in an M8 × 1 thread, at 10 g.
Subsea M14 Metal Diaphragm Sensor
350 m, stainless diaphragm, serial output for long cable runs.
Subsea M10 Water Temperature Sensor
±0.1 °C at address 0x77, so it shares a bus with a depth sensor.
All subsea sensors
Depth, temperature and leak sensing for ROVs and AUVs.
Sources.
- Pressure range, operating depth, overpressure limit, thread size, supply voltage, output signal and I2C address, resolution, accuracy, material, connector, mass and operating temperature for the Blu-Sub M8, M10 and M14 depth sensors and the M10 water temperature sensor, from the manufacturer's published specifications.
- Hydrostatic relation p = ρgh, with density taken as 1025 kg/m³ seawater and 1000 kg/m³ fresh water and gravity 9.80665 m/s². The conversions from ±200 mbar and from ±1% of 35 bar into metres are worked in the text and can be repeated.
- Blu-Sub M10 30-bar depth sensor (accessed 2026-09-07)
- Blu-Sub M14 diaphragm 35-bar depth sensor (accessed 2026-09-07)
- Blu-Sub M8 30-bar depth sensor (accessed 2026-09-07)
Published 7 September 2026. Last revised 25 September 2026. Corrections to sales@vebixautomation.com.
Specifying depth measurement for an ROV?
Send us your working depth, the accuracy you need, the controller and its free interfaces, the cable run and your end-cap thickness. We will reply with a shortlist of parts that work together, including the penetrator. Ask for a quote.
More on underwater robotics
- Underwater and ROV thrusters in IndiaBlu-Sub and Blue Robotics underwater thrusters for ROVs, AUVs and USVs, with prices in rupees and delivery across India included.
- How to choose an underwater thruster for an ROVHow to choose an underwater thruster for an ROV by thrust, voltage, depth rating, ESC, rotation and mounting.
- How to size an underwater thruster for an ROVSize ROV thrusters from drag, target speed and vectoring angle. Worked method for thrust per unit, thruster count and the margin real vehicles need.
- Designing a 300-metre ROV propulsion systemPropulsion design for a 300-metre ROV: thruster count and layout, bus voltage, tether losses, sealing and the effect on buoyancy.
- Aluminium versus acrylic subsea enclosuresAluminium and cast acrylic subsea housings compared on depth rating, optical access, heat, servicing and cost.
- Selecting a subsea enclosure for marine research payloadsHow to choose a subsea enclosure, end caps, seals and penetrators for research payloads, and how to test them before fieldwork.
/LR/thumb/Blu-Sub_M10DepthSen_LR_01.jpg)

/LR/thumb/Blu-Sub_M14DepthSen_LR_01.jpg)
/LR/thumb/Blu-Sub_M8DepthSen_LR_01.jpg)